Most sellers gauge how well their home is performing based on the number of showings scheduled. Now, with Paragon Connect, access a more complete picture by analyzing buyer preferences and turning that data into valuable insights your clients.
As an agent, you can use Paragon Connect to:
- See how many views your listing has received,
- Track how many people have marked the listing as a Favorite, Possible, or Rejected in the Collaboration Center,
- View how often the listing appears in searches.
In this Tech Tip, we will walk you through how the Seller-side information is presented to you as the agent, and how to assign or remove a contact from a listing.
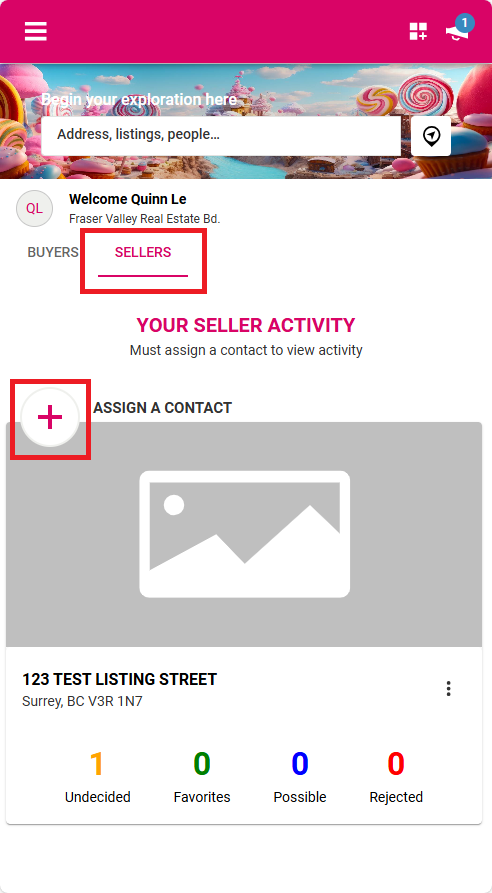
Assigning a Contact to a Listing
- Navigate to the Sellers tab.
- Click the plus sign to Assign a Contact.
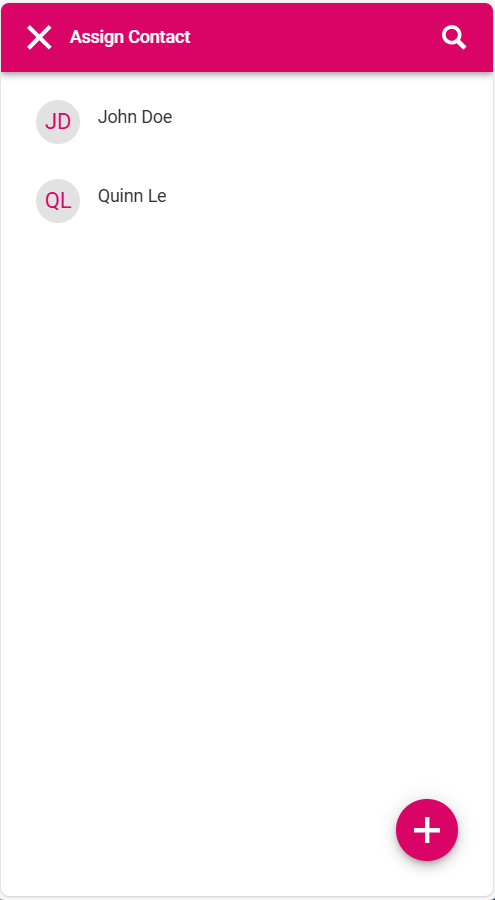
3. Select an existing contact, use the search box to refine your list, or click the plus sign again to add a new contact.
4. Enter a personalized welcome message.
5. Choose the email notification frequency for both the client (seller) and yourself: Off, Daily, or Weekly.
6. Click Save to complete the Sell Side Setup and begin sending notifications.
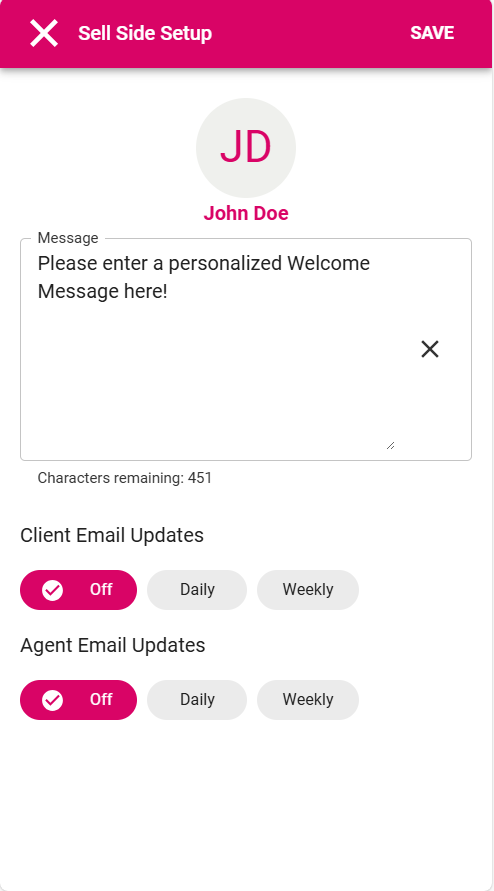
7. A confirmation message will appear stating that you’ve “successfully associated the contact with the listing.”
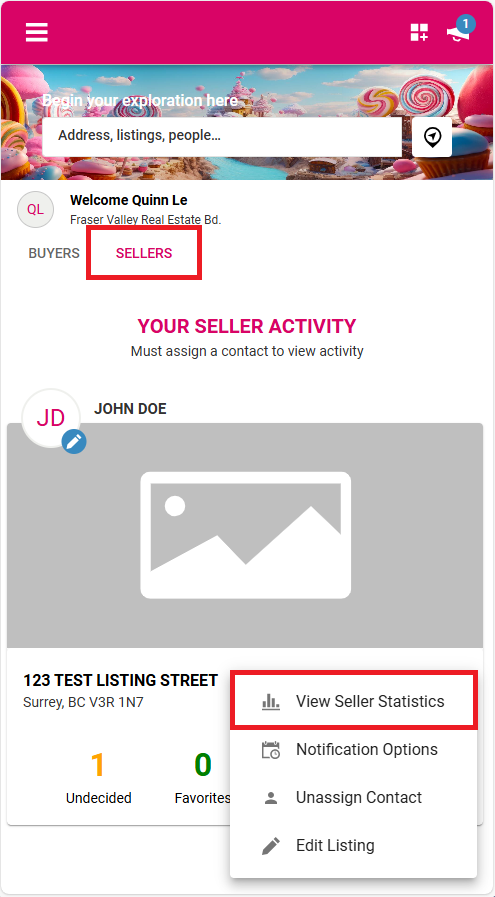
From the Sellers tab, click the three-dot menu and select View Seller Statistics to see detailed activity and performance insights for your listing.
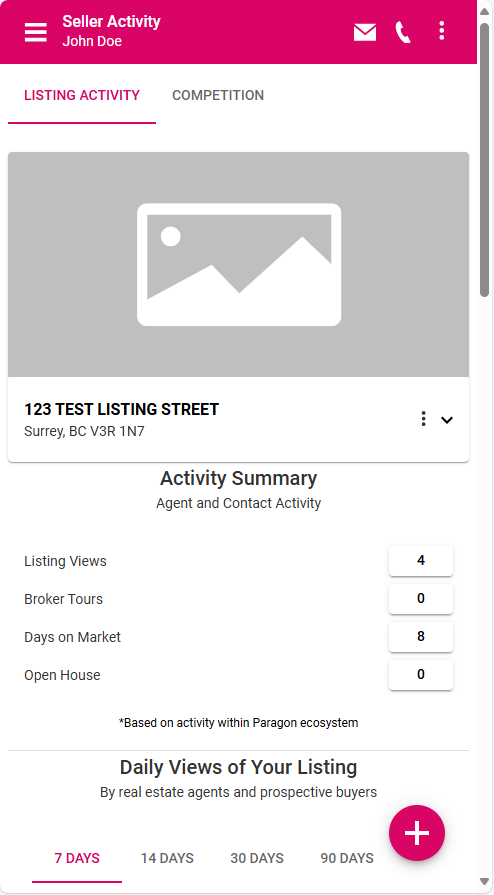
The statistics displayed on this tab mirror those found in the Listing Activity Report (accessible only by you via ‘Select an Action’ in Listing Maintenance – in Paragon Pro) but are presented in a more visually appealing and accessible format.
The Statistics page provides key ‘Seller Side’ insights, including:
- Activity Summary: Listing views, broker tours, DOM (Days on Market), and open houses,
- Daily Views: A chart showing daily listing activity,
- Viewer Breakdown: Views from agents versus prospective buyers,
- Buyer Interest: How many marked the listing as ‘Favorite’, ‘Possible’, or ‘Rejected’,
- Price Changes: Tracked over time,
- Recommendations: Number of agents recommending your listing,
- Saved Searches: Times your listing was saved by agents or buyers,
- Comments: From both agents and prospective buyers,
- Social Activity: Views from email or Facebook, and related comments.
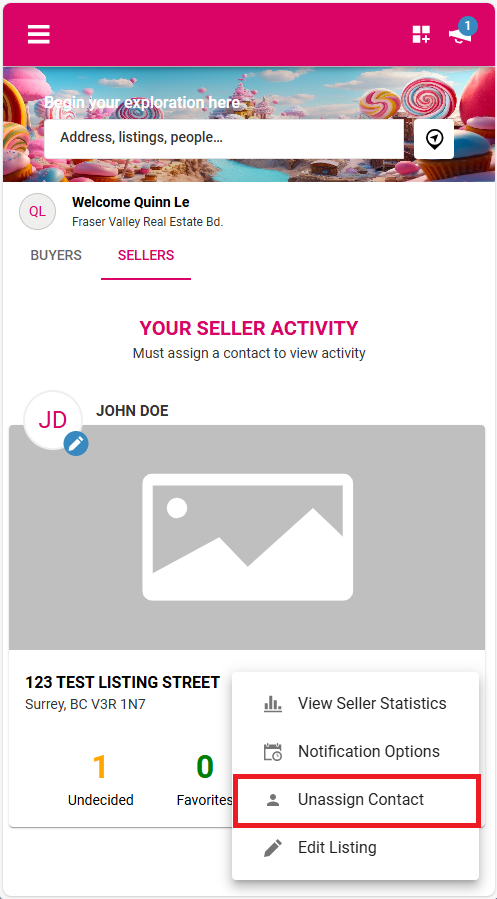
Remove a Contact from a Listing
From the Home Page:
- Click the Sellers tab,
- Click the pencil icon inside the circle on the contact’s initials or image,
- Click the 3-dot menu and select Unassign Contact,
- Select Remove to confirm,
- A confirmation message will appear: “Successfully removed the contact from the listing”,
- This action removes the ‘Seller Activity’ tab in the Collaboration Center.